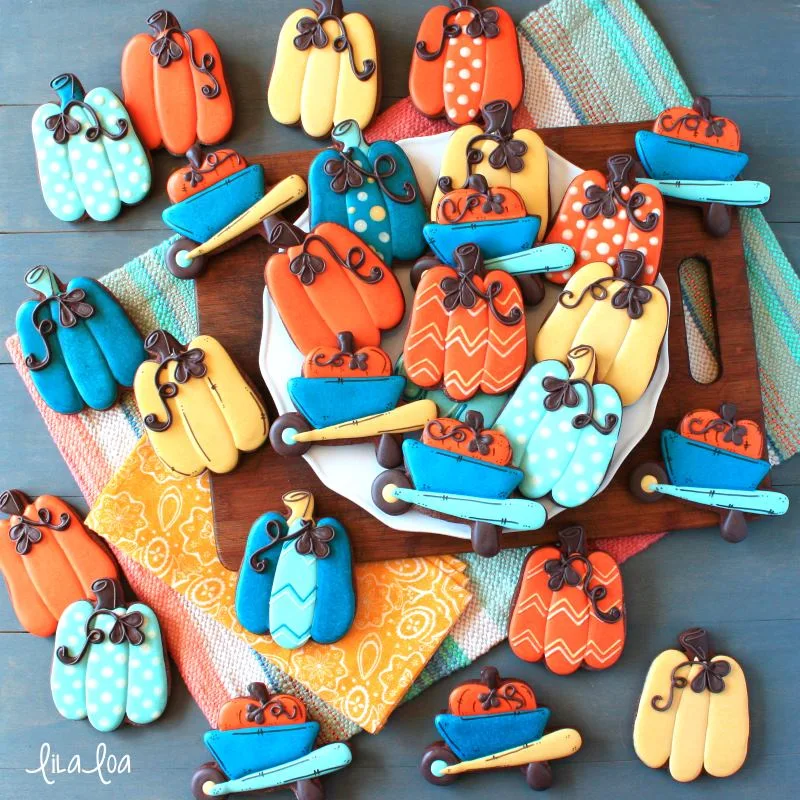
Learn how to make some harvest themed pumpkin cart decorated sugar cookies with this royal icing cookie decorating tutorial!!
I am ready for a good old-fashioned family holiday.
Like... on a scale from "one" to "waiting for the baggage carousel at the airport to start moving" -- I am solidly at "watching a pot until it boils."
Bring on the fun and adventure and pure unadulterated chaos that reins supreme on the throne of excess sugar consumption.
I can't promise you that the turkey will come out "right." But by golly, I can certainly promise you that there will be children screaming and pumpkin pie used as an art medium on a couch somewhere. Games WILL BE MIXED into each other and somehow another child will reach the age of "too big for the kid table again" this year.
We will have side dishes that refuse to be made the way that grandma made them. And we will have a grandma that lets us know. Cousins will be late and at least one semi-important food item will be forgotten.
Salads will get soggy and a vaguely responsible someone will fall asleep on a floor while children run rampant around them. There will be disagreements and joy in simply existing near people that ARE your people.
There will be hugs. And cries of delight. There will be too many pies...and yet never enough of the favorite flavors. Something that holds only intrinsic value will get broken and tears will come at some point.
And memories will be made. And shared. And friends and family will be loved. And....they will be a little bit buggy too. And there will be gratitude for it all...from top to bottom, inside and out.
Whether you are at the top this year, or hitting a low slide... I hope you find joy in the holidays.
I'm grateful you're here.
How to make pumpkin harvest cart decorated sugar cookies:
Step 1.
With a medium-consistency yellow royal icing, pipe a dot in the center of the wheel area of the cookie. Let it dry for 30 minutes.
Step 2.
Pipe the rest of the wheel with a medium consistency brown royal icing and a #3 piping tip. Let the cookie dry for 30 minutes.
Step 3.
Outline and fill the frame and handle area of the wheelbarrow with medium-consistency pale blue royal icing. Let the cookie dry for another 30 minutes.
Step 4.
Outline and flood the tray area of the wheelbarrow cookie with a darker blue medium-consistency royal icing and a #3 piping tip. Add a leg to the cart with the medium-consistency brown royal icing. Let the sugar cookie dry for an hour.
Step 5.
Outline and fill the pumpkin shape at the top of the wheelbarrow with a medium-consistency orange royal icing. Let dry for 30 minutes.
Step 6.
Pipe a leaf at the top of the pumpkin by first piping 3 dots of brown royal icing and then pulling them towards a center point. Pipe the stem of the pumpkin with the same brown royal icing. Let the cookie dry for another 30 minutes.
Step 7.
Use a black food color marker to add detail lines to the pumpkin and the cart.
Step 8.
Pipe a vine on the pumpkin that connects the leaf to the stem with a thick-consistency brown royal icing and a #1 piping tip.
See it all come together in this pumpkin harvest cart cookie decorating video tutorial.
NEED MORE??
Grab the supplies you need: harvest cart cutter, pumpkin cutter, and black food color marker.
Grab the food color formulas to recreate these royal icing colors HERE.


