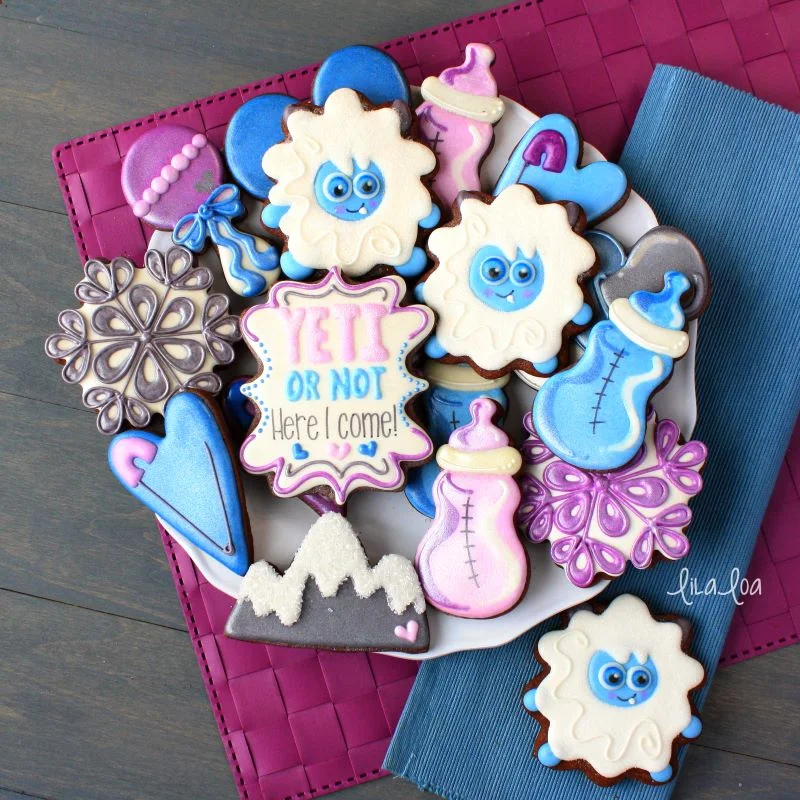
Learn how to make some wet-on-wet baby bottle decorated sugar cookies with this royal icing cookie decorating tutorial!!
My youngest just asked if she should throw her snack wrapper into the “garbage” or the “fake garbage.”
I’ve got to say...this explains a lot of things.
Like...the smell coming from the back of her closet.
And the stunning lack of matching socks OR shoes or coats, jackets, gloves, hats....etc. I know she's certainly not WEARING them.
The sudden re-appearance and re-re-appearance of old "homework." You guys. She's in pre-school. What she calls "homework" is generally an art project where she cuts an oddly shaped scrap of paper, colors it with a marker and calls it a dog toy. She's been making them night and day like she's got a spot on Shark Tank.
Also... we don't have a dog.
I think it is pretty safe to say that cleaning out the "fake garbage" was NOT my favorite thing in the history of ever.
But this theme for a baby shower -- "Yeti or not- here I come!!" definitely makes the list of my favorite things! It's sooooo adorable! I need more adorable in my life.
And decidedly less fake garbage.
These fun wet-on-wet baby bottles are the perfect addition to a set of baby cookies. With only 3 steps, they are quick and easy to make!
See it in action here.
How to make Yeti decorated sugar cookies:
Step 1.
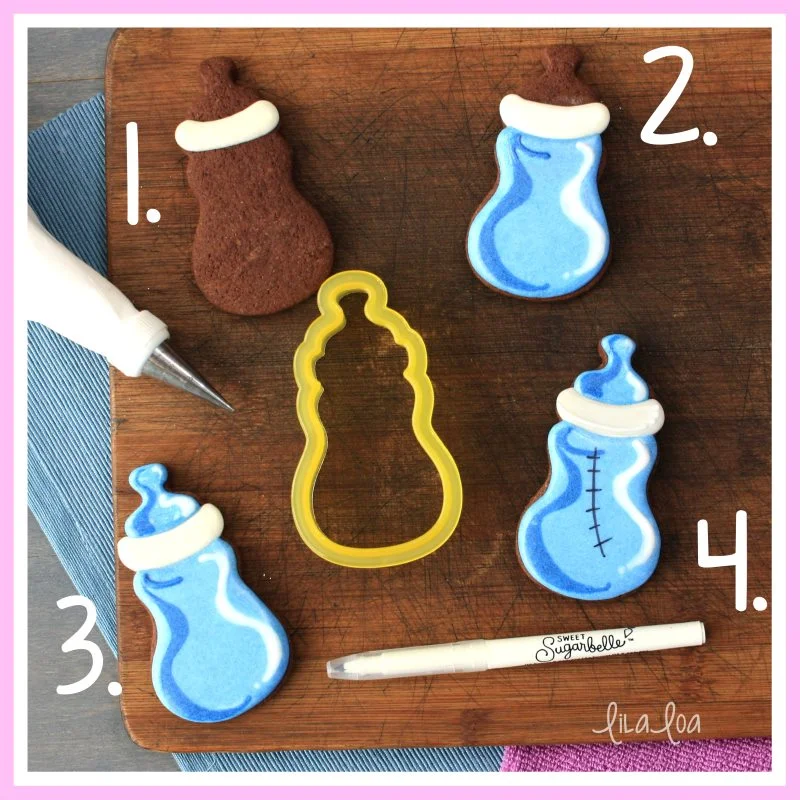
Pipe the collar area of the bottle with a medium consistency white icing and a #3 tip. Let dry for at least four hours.Step 2.
Outline and fill the bottom part of the bottle with a medium consistency light blue icing and a #2.5 tip. (I use a slightly smaller tip because I'm going to be adding more icing on top and I don't want to overload the cookie.) Working quickly while the icing is still wet, pipe a curvy shadow line on the left side of the bottle with a darker blue icing and a #1.5 tip. Accentuate the curves by making them a little wider. Do the same thing with white icing on the right side of the cookie.Step 3.
Outline and fill the top of the bottle with the light blue icing. Immediately add a curvy shadow line on the left side of the cookie with the dark blue icing. Add a curvy reflection line on the right side with the white icing. Let dry overnight.Step 4.
Add the detail line to the bottle collar with the white icing and a #1.5 tip. Use a food color marker to draw the measurement lines on the side of the bottle. Like most of my cookies...I go for deliberately wonky because it's a lot harder to mess up than if I were aiming for perfection...but you can draw your measurement lines straight if you want to. I won't judge.See it in action here.
NEED MORE??
Get the supplies: bottle cutter, Yeti cutter, plaque cutter, snowflake cutter, mountain cutter, large heart cutter, rattle cutter, letter cutters, and black food color marker.


