Learn how to make some easy moon and star decorated sugar cookies with this royal icing cookie decorating tutorial!!
When I was in college, I was a whitewater rafting guide in a fairly remote part of Wyoming. The nights were warm with just a little edge of cool wind coming through. And it was dark. So so dark without a moon. You could actually see the Milky Way. And it seemed like I would always be 23 years old.
And then I grew up. Well...uppER.
I certainly didn't get any taller. But I got married. I got some kids. I got some more life experiences. I got a house and a car and a job... I started making a ridiculous amount of sugar cookies on a daily basis and generally avoided making a fool of myself in public - with the notable exception of certain karaoke nights and week long cookie parties.
But I STILL stare at the night skies of summer and feel that physical connection to all of time and space.
As it turns out though...summer nights don't last forever.
And the deep night skies of summer are turning into the cold open skies of winter.
And I love those too.
Basically what I'm saying here is that I'm a creature of the night that likes to eat allllll the sugar, sing karaoke and make cookies. And sometimes I do all of them at once.
Want to join me?
How to make man in the moon decorated sugar cookies:
Step 1.
Outline and fill the entire cookie with a #3 size tip or opening and medium consistency white icing. Let dry for at least 8 hours.
Step 2.
With a DAMP (but not WET) brush, paint navy blue food coloring along the left side of the circle. Paint water directly on top of the right side of the circle. With quick movements, pull the navy food coloring from the left side of the cookie toward the right side. Let dry for an hour.
Step 3.
Dip a paintbrush in water and tap off excess water. Dip the damp brush in white food coloring. Tap the paintbrush with a butter knife to drop dots of white food color on to the cookie.
Step 4.
Print and cut the moon template and place on top of the cookie. Use the white food color to paint along the edges to give you guidelines. Use the guidelines to pipe the moon shape with the white icing. Let dry for 4 hours. (Alternatively...you can use a projector if you're into technology and stuff.)
Step 5.
Mix silver luster dust with water and a tiny bit of white food coloring and the TINIEST amount of black food coloring to form a thick, smooth paste. Paint the moon with the silver paste.
How to make galaxy star decorated sugar cookies:
Step 1.
Drop blobs of light purple icing in the middle of a plate. Alternate adding blobs of dark purple, navy, and black icing as well until the puddle of icing is larger than a cookie. Place a cookie upside down in the icing puddle. Press around the edges gently. Turn the cookie sideways as you pull it away from the icing. Use a toothpick to remove icing that is falling off the edges. Add smaller drops of purple or blue if any cookie needs more color. Let dry for 4 hours.
Step 2.
Dip a paintbrush in water and tap off excess water. Dip the damp brush in white food coloring. Tap the paintbrush with a butter knife to drop dots of white food color on to the cookie. Let dry for 20 minutes. Gently smudge some of the white to create light auras.
Step 3.
Pipe stars on the surface of the cookie with gray icing. Let dry for an hour.
Step 4.
Mix silver luster dust with water to form a thick, smooth paste. Paint the stars with the silver paste.
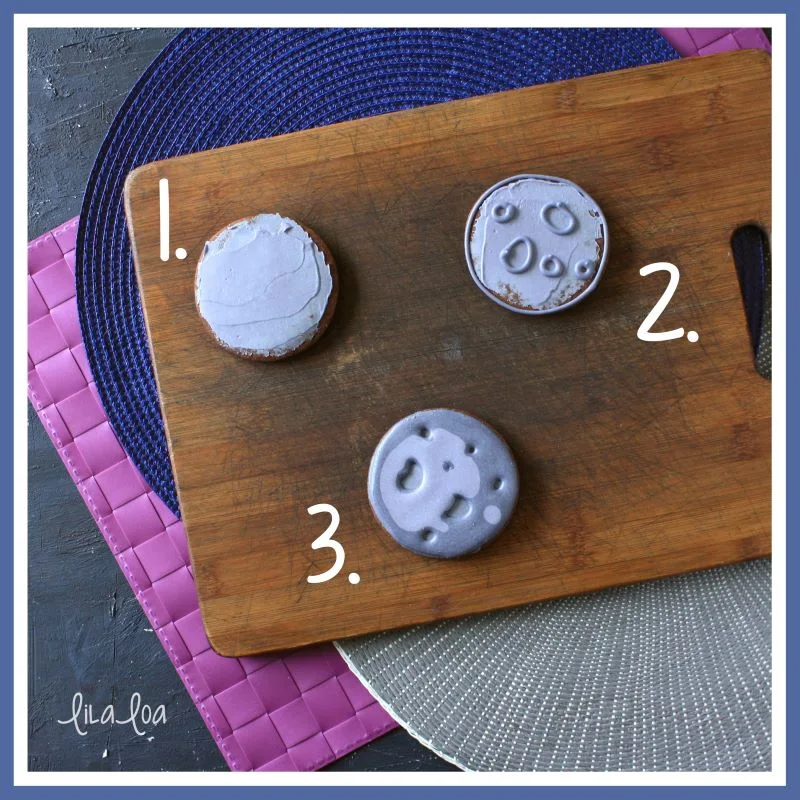
How to make cratered moon decorated sugar cookies:
Step 1.
Step 2.
Step 3.
See it all come together in this Night Sky cookie decorating video tutorial.
NEED MORE??
Get the supplies: My favorite circle cutters, silver luster dust, white food coloring, and decorating brushes.
You can find all of my NON-SPREADING cookie recipes here.
Get your royal icing questions answered here.


